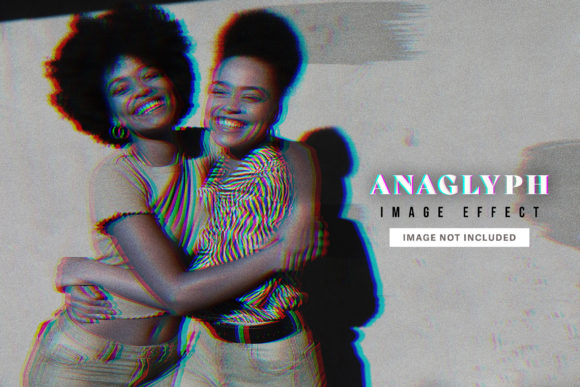
Anaglyph Image Effect for Photoshop: Integrating Retro 3D Aesthetics into Modern Workflows
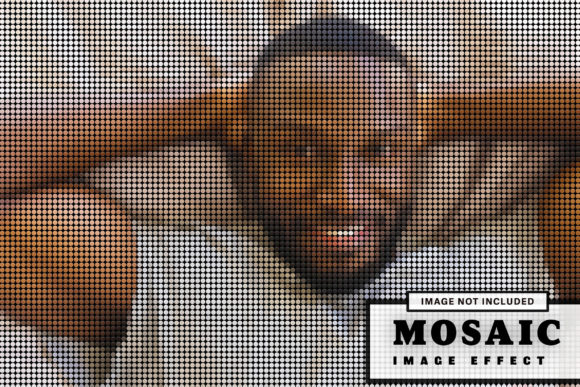
The resurgence of retro-futuristic aesthetics in digital design has made the anaglyph effect a staple for marketers, content creators, and graphic designers seeking to add depth and nostalgia to their visuals. An Anaglyph Image Effect for Photoshop is not merely a filter; it is a structured workflow tool that simulates three-dimensional depth through chromatic aberration. By separating color channels and offsetting them, this technique creates the illusion of 3D when viewed with red-cyan glasses, or simply adds a distinctive, edgy texture to standard 2D displays. For professionals managing high-volume creative output, having a pre-configured, organized asset is significantly more efficient than building channel displacement maps from scratch for every project.
Incorporating this specific effect into your creative pipeline requires understanding both the technical specifications of the file and the strategic application of the aesthetic. Whether you are designing album artwork, social media campaigns, event posters, or editorial layouts, the utility of this resource lies in its balance of high-resolution fidelity and editability. This article explores how to practically implement, customize, and integrate this 3600 x 2400px RGB asset into professional Adobe Photoshop workflows while maintaining quality control and efficiency.
Technical Specifications and Workflow Compatibility
Before integrating any new asset into a production environment, verifying technical compatibility is essential to prevent bottlenecks downstream. This Anaglyph Image Effect for Photoshop is engineered with specific parameters that cater to both digital and print workflows. The canvas size of 3600 x 2400 pixels provides ample resolution for large-format printing while remaining manageable for web optimization. At 300 DPI, the file meets industry standards for commercial print, ensuring that the delicate color fringing characteristic of anaglyph effects remains crisp rather than pixelated when reproduced physically.
The color mode is set to RGB, which is critical for anaglyph processing. Unlike CMYK, which is optimized for ink mixing, RGB preserves the pure light values necessary for the red and cyan channel separation to function correctly. Designers working on print projects should maintain the file in RGB throughout the editing phase to preserve the effect’s integrity, converting to CMYK only at the final export stage if required by the printer. This preserves the vibrancy of the chromatic shift, which often dulls significantly during premature color space conversion.
Compatibility extends to software versioning as well. This product works with Adobe Photoshop CC or higher versions, leveraging modern smart object functionality and adjustment layers. Users operating on legacy versions of CS6 or earlier may encounter issues with layer styles or smart filters that do not translate backward. Ensuring your software environment is up-to-date is a prerequisite for utilizing the non-destructive editing features embedded in this file.
Navigating Layer Organization and Smart Objects
Efficiency in post-production is defined by how quickly a designer can locate and modify specific elements. Clearly organized and labeled layers are the primary advantage of using a premium PSD over a free, unstructured alternative. When opening this Anaglyph Image Effect for Photoshop, users will typically find a hierarchy separated into distinct groups: "Place Your Image Here," "Effect Layers," "Color Grading," and "Background." This structural logic mirrors professional studio workflows, reducing cognitive load during tight deadlines.
The core mechanism of this file relies on Smart Objects. Rather than applying destructive filters directly to pixel data, the effect is applied to a container. To customize the artwork, you double-click the designated Smart Object thumbnail, replace the placeholder content with your own photography or illustration, and save the embedded document. The main composition then updates automatically. This non-destructive approach allows for infinite iteration; you can swap images, adjust cropping, or retouch the source material without ever degrading the original anaglyph displacement map.
For users who need to adjust the intensity of the 3D effect, the labeled layers provide direct access to the underlying mechanics. Often, the anaglyph shift is controlled by moving specific color channels or adjusting layer masks. Because these are isolated and named, a designer can easily reduce the offset distance for a subtle glitch look or increase it for a more extreme, disorienting 3D sensation. This level of granular control transforms the file from a static template into a flexible design system adaptable to various brand guidelines.
Strategic Application Across Creative Projects
Understanding where this effect fits within a broader project lifecycle maximizes its ROI. The anaglyph aesthetic communicates specific semiotic cues: technology, retro culture, music, nightlife, and experimental art. It is less suitable for corporate financial reporting or luxury spa branding but highly effective for targets audiences aged 20–50 who associate the visual language with authenticity and subculture.
Pre-Production Planning: Before opening Photoshop, consider the source imagery. Anaglyph effects perform best with high-contrast subjects and clear foreground-background separation. Flat, low-contrast images often result in muddy color bleeding. During the planning phase, select photography that supports depth. If shooting specifically for this effect, use directional lighting to enhance shadows, as the anaglyph process relies on luminance differences to generate the perception of volume.
During Execution: When compositing, treat the anaglyph effect as a blending mode rather than a final overlay. It interacts dynamically with typography and other graphic elements. Place text above the effect layer to ensure readability, or mask out the effect in areas where legibility is paramount. For marketers creating ad sets, this PSD serves as a master file. You can create multiple variations by toggling visibility of different adjustment layers included in the stack, allowing for rapid A/B testing of visual intensity without rebuilding the effect.
Post-Production and Export: Remember that placeholder images are not included in the final files. This necessitates a disciplined asset management strategy. Always retain a copy of the original licensed photography used within the Smart Object. When exporting for web, test the image on multiple devices. The RGB split that looks vibrant on a calibrated desktop monitor may appear too aggressive on mobile screens with lower pixel density. Creating a web-specific export action that slightly reduces saturation or contrast can ensure consistency across platforms.
Quality Control and Customization Best Practices
Easy to customize does not imply zero oversight. Maintaining quality control when using automated effects prevents the output from looking generic. One common pitfall is ignoring color grading. The default anaglyph settings in the PSD are calibrated for neutral tones. If your inserted artwork has a strong warm or cool cast, the red/cyan balance may skew unexpectedly. Utilize the included Color Balance or Curves adjustment layers to neutralize unwanted tints or to intentionally push the palette toward a specific mood.
Another consideration is edge artifacts. High-frequency details like hair, foliage, or chain-link fences can create visual noise when channels are displaced. In such cases, apply a slight Gaussian blur to the displacement map or use a layer mask to soften the effect in detailed areas while keeping it sharp on the main subject. This selective application demonstrates professional craftsmanship and distinguishes your work from amateur implementations.
Long-term use of this asset involves archiving and versioning. Since the file is 300 DPI and 3600 x 2400px, file sizes can grow substantially once high-resolution assets are embedded. Implement a naming convention that includes the project name, date, and version number. Regularly purge unused Smart Object data via the "Purge" command in Photoshop to keep file sizes manageable for cloud storage and team collaboration. For agencies, creating a stripped-down "master" version of the PSD with all proprietary client assets removed ensures the template remains clean for future reuse.
Integrating with Broader Design Ecosystems
This Anaglyph Image Effect for Photoshop rarely exists in isolation. It functions as a node within a larger ecosystem of tools and platforms. For video editors, the still frames generated from this PSD can serve as keyframes or transitions in After Effects or Premiere Pro. The layered structure allows you to export individual channels as separate PNG sequences, enabling animated parallax effects in motion graphics software. This cross-platform interoperability extends the value of the purchase beyond static design.
For educators and content creators teaching digital art, this file serves as an excellent pedagogical tool. The clearly organized layers demystify the complex process of channel manipulation. Instead of explaining abstract theory, instructors can show students exactly how Red, Green, and Blue channels interact to form depth. Similarly, freelancers can use this asset to expedite client mockups. Presenting a concept with a polished anaglyph treatment can help sell an idea more effectively than a flat wireframe, bridging the gap between conceptualization and final delivery.
Ultimately, the decision to utilize this Anaglyph Image Effect for Photoshop should be driven by workflow efficiency and aesthetic alignment. It solves the technical complexity of 3D simulation while providing the creative flexibility required for bespoke design. By respecting the technical constraints of RGB color spaces, leveraging smart objects for non-destructive editing, and applying strategic quality control, professionals can seamlessly integrate this retro-modern effect into their repertoire. The result is a streamlined process that delivers high-impact visuals without sacrificing the precision and organization demanded by professional creative environments.